Monday, June 30, 2008

Warm Days Ahead

Living in Québec means that in the winter we get extremely cold temperatures and a lot (a LOT) of snow. So much so that I sometimes wonder if the snow will ever melt. Well, the snow has indeed melted and gone with it are the days of craving warm soups and cup after cup of hot chocolate. Instead I’ve been making sandwiches and craving lemonade.

To me lemonade has to have the perfect balance of tartness and sweetness. Once again using the trusty Food Blog Search widget, I found the Perfect Lemonade courtesy of Elise at Simply Recipes. Making lemonade couldn’t be simpler and really, I don’t know why I’d never tried it before! The kids totally loved it and they were so impressed that lemonade was something we could make ourselves.

I think its important to show them that a lot of things we find ready made at the grocery store can be made right here in our kitchen. And that homemade beats store bought any day! Summer is only just starting and I can’t wait to try a few lemonade variations. Something to make the warm days ahead a little cooler.

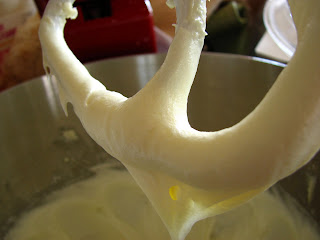
CLICK: The photo at the top is my entry for this month's CLICK event hosted by jugalbandi. CLICK Yellow for Bri is a special edition of the event and you can find out more about it here and here.

Pin It!

Tuesday, June 24, 2008

Tuesdays With Dorie - Mixed Berry Cobbler

It's Tuesdays with Dorie time again! This was my first time making a cobbler and from the look of the photo in the book, it looked more like a fruit soup topped with a pie crust. Needless to say, it wasn’t one of the recipes that had caught my eye so I decided to tweak it a bit and end up with something that might suit my taste a bit better.

I started by halving the recipe, cutting the butter a bit and replacing it with some Quark cheese, and I used whole milk instead of cream. Then I decided to use half whole wheat flour, half all purpose, added some vanilla extract and used a bit more sugar than was called for. I ended up with a dough that was a bit stickier, like a dumpling, which is what I wanted. For the filling I used a mix of fresh fruit : cherries, blueberries, raspberries and strawberries. I mixed it up with some sugar, cornstarch, lime zest and a bit of lime juice.

I divided the fruit filling into baking dishes, topped it with my dumpling-like dough and sprinkled it with some coarse sugar. I ended up with more of an upside down fruit cake which was quite delicious with a bit of whipped cream. Using the soft cheese and a bit of vanilla in the dough gave it a lot of flavor. Of course, this might not be a traditional cobbler, but we liked it well enough.

The choice this week comes courtesy of Beth from Our sweet Life, you can find the recipe on her blog, or on NPR. For more takes on this dessert, check out the Tuesdays with Dorie blogroll.

Pin It!

Sunday, June 22, 2008

Craving Some Cake

Whenever I have some very ripe bananas, I jump at the chance to make my trusty banana bread. But for a while now, I’ve been craving cake. So I decided to combine the cake craving and the need to use up the bananas and make banana cake.

I’d made many banana breads and muffins before but I had never made banana cake, so I started looking for recipes. I noticed a lot of them mentioned cream cheese frosting. Really? I thought. Cream cheese frosting on a banana cake? Well, I was definitely going to try that! Any excuse to make cream cheese frosting is a good one.

So I used the fantabulous cream cheese frosting recipe from Bill’s Big Carrot Cake, with a few tweaks, and wow, that was one good cake! So if you have a few over ripe bananas, and you need an excuse to make cream cheese frosting, this cake is for you!

Banana Cake
Adapted from Allrecipes

2 cups all-purpose flour
1 teaspoon baking soda
1/2 teaspoon salt
1/4 tsp cinnamon
1/4 tsp freshly grated nutmeg
1/2 cup unsalted butter, softened
1 cup white sugar
2 eggs


4 ripe bananas, mashed
1 teaspoon vanilla extract

Preheat oven to 375 degrees F (190 degrees C). Grease and flour two 9-inch round cake pans.

In a medium bowl, mix together the flour, baking soda, salt, cinnamon and nutmeg; set aside.

Cream together the butter and the sugar.

Add eggs one at a time, beating well in between each addition. Add bananas and vanilla extract; mix well. Add the dry ingredients and mix thoroughly. Pour batter into the prepared pans.

Bake at 375 degrees F (190 degrees C) for 30 minutes. Cool and frost cake.

Cream Cheese Frosting
Adapted from Baking From My Home To Yours by Dorie Greenspan

4 ounces low-fat cream cheese, room temperature
1/2 stick ( 4 tablespoons) unsalted butter, at room temperature

1/2 pound or about 2 cups confectioners' sugar, sifted

1/2 to 1 tablespoon fresh lemon juice or 1/4 teaspoon pure lemon extract

Finely chopped toasted pecans and toasted pecan halves

In a large bowl, working with your mixer of choice, beat the cream cheese and butter together until smooth and creamy. Gradually add the confectioner’s sugar and keep beating until the frosting is very smooth. Beat in the lemon juice or extract.

Frost the cake and decorate the sides with the chopped pecans and the top with the pecan halves.

Pin It!

Tuesday, June 17, 2008

Tuesdays With Dorie - Not Your Traditional Cream Puff

I don’t remember where I first heard of churros. Maybe it was from the Food Network or from one of the many blogs I read everyday, but these fried delicacies intrigued me. While searching for recipes, I noticed that making churros was a lot like making pâte à choux.

So when I saw that Caroline, of A Consuming Passion, had chosen the Peppermint Cream Puff Ring for this week’s Tuesdays with Dorie, I knew what my cream puff would become. Pâte à choux is quite simple to make and what makes them churros is their shape and the fact that they’re usually dipped in a mixture of sugar and cinnamon. Since I wanted to keep the mint aspect of the recipe, I omitted the cinnamon and added a little vanilla to the dough, for added flavor.

We all loved these, they were a real treat with the Chocolate Sauce and the Mint Scented Whipped Cream. If you’d like the recipe for Dorie’s Peppermint Cream Puff Ring, you can find it on pages 290-292 of Baking From My Home To Yours and on Epicurious. You'll also want to check out the Tuesdays With Dorie Blogroll to see what the other members came up with. If you want something less traditional, give these churros a try, I’m sure you won’t regret it!

Untraditional Churros
1 cup whole milk
4 tbsp butter
1 tbsp sugar
1/4 tsp salt
1 tsp vanilla
1 cup flour
2 eggs

1/2 cup granulated sugar, for dipping

3 cups canola oil, for frying

In a medium saucepan, mix milk, butter, sugar and salt. Bring to a boil over medium heat. Add vanilla. Add flour all at once and stir vigorously with a wooden spoon until the dough forms a ball. It will take about one minute. Transfer the dough to a large bowl and let it cool about 5 minutes. Using your wooden spoon, beat in the eggs one at a time until they are incorporated in the dough. It will look lumpy at first, but the dough will come together.

In a large, heavy skillet, heat oil to 350F. Spoon the dough into a pastry bag fitted with a large star tip. Once the oil is hot, pipe in the batter into 3 to 3-1/2 inch long strips, cutting the strip with a knife or kitchen shears. Fry the churros until golden, about 4 minutes total, turning them once or twice. Remove them from the oil onto a paper towel lined baking sheet and let them cool enough to touch. Dip the churros in the granulated sugar to coat.

Chocolate Sauce
2 ounces bittersweet or dark chocolate
1 cup milk
1/2 tbsp cornstarch
2 tbsp sugar (or to taste)

In a small saucepan, over low heat, place 1/2 cup milk with the chocolate and stir constantly until the chocolate is melted. In a small bowl, combine the cornstarch with the remaining 1/2 cup milk and stir it into the chocolate. Add the sugar and stirring with a whisk, cook the mixture until it has thickened. It will take about 5 minutes. If the chocolate sauce is lumpy, whisk it vigorously until it is smooth. Pour into cups or small bowls and top with Mint Scented Whipped Cream.

Mint Scented Whipped Cream
1/2 cup heavy cream
2 to 3 tbsp sugar (to taste)
1/8 to 1/4 tsp peppermint extract (to taste)

Pour the heavy cream in your mixer bowl of choice and whip at medium speed until it starts to thicken. Add the sugar and the peppermint extract and whip until the cream holds its peaks. Spoon onto the chocolate sauce and, if you wish, decorate with some fresh mint leaves.

Pin It!

Wednesday, June 11, 2008

Weather Troubles

The weather has been so weird lately. One minute it's sunny, humid and intolerably hot and the next minute the sky breaks open and rain is falling for the next hour. And then the sun comes out again and it gets all hot and humid, again. That is not baking weather. At all.


And I feel like baking. I feel like having cake or cookies but the thought of the oven being on at 350F for more than an hour is just the thing to get me out of my baking mood. So I look at blogs and check out ice cream and sorbet recipes and I'm always missing one key ingredient. Why didn't I think of this when I made my shopping list last weekend?

OK, enough of this feeling sorry for myself. I made these peanut butter cookies a few weeks ago, with every intention of sharing them with you but other things had to be done and they've been patiently waiting their turn. I'm not usually a big fan of peanut butter in baked goods but peanut butter cookies are the exception.

Maybe it's the crispy, crunchy factor that I like in these or maybe it's the chocolate chips but in any case I like these a lot. So much that, I wish I had some right now. So much that I might brave a 350F oven for an hour or so. Oops, out comes the sun again... No, no baking for me today. Excuse me while I get my ice cream recipes out and go make a shopping list.

For the recipe, visit Deb over at Smitten Kitchen.


Pin It!

Thursday, June 5, 2008

The Blogging Community, at its Best

Although I haven’t been blogging for a very long time, I would have had to be blind not to notice the overwhelming amount of love and support throughout the blogging community. From blogging awards to birthday wishes and sincere get well soon comments, I have felt the love myself and now it’s time to give some back.

Everyday as I click on a recipe or a blog link, I keep discovering talented people and wonderful blogs. I have only recently discovered Briana Brownlow’s blog, Figs with Bri, and I really wish I had found it under different circumstances. Bri is fighting cancer and some wonderful people have decided to support her and help her fight. If you would like to help Bri, go to the end of this post and you will find all the information you need about the event that Bee and Jai of jugalbandi have organized.

I decided to share this recipe for Rhubarb Raspberry Galette with you today because it feels to me like a comforting dessert. Something you would bring to a friend’s house when they’re feeling down or just to say: “Hey, let’s have a cup of coffee and talk”.

Although rhubarb is classically paired with strawberries, the raspberries are wonderful in this. The raspberries I used were a bit tart so the galette didn’t turn out overly sweet and you could still taste the tartness of the rhubarb as well. I'm telling you, these are the perfect excuse to forget about housework, visit a friend and have a nice chat.

Rhubarb Black Raspberry Galettes
Canadian Living Magazine June 2008

2 cups all purpose flour
1/2 cup cornmeal
1 tbsp. granulated sugar
1/2 tsp. salt
1 cup cold unsalted butter, cubed
3 tbsp. sour cream
1/2 cup ice water (approx.)

Filling:
1 cup granulated sugar
3 tbsp. cornstarch
5 cups sliced fresh rhubarb
1 1/2 cups black or red raspberries
1 tbsp. lemon juice
1/2 cup dry bread crumbs
2 tbsp. butter, softened (I forgot this, oops…)

Glaze:

1 egg yolk

In bowl, mix together flour, cornmeal, sugar and salt; using pastry blender or 2 knives, cut in butter until in large crumbs. In glass measure, whisk sour cream with water; drizzle over flour mixture, tossing with fork until dough comes together and adding up to 1 tbsp more water if necessary. Divide into 6 pieces. Shape each into disc. Wrap each in plastic wrap; refrigerate for 30 minutes or until chilled. (Make-ahead: Refrigerate for up to 24 hours.)

Filling: Remove 2 tbsp of the sugar and set aside for sprinkling over galettes. Whisk remaining sugar with cornstarch; set aside.

In large bowl, toss together sliced rhubarb, berries, lemon juice and cornstarch mixture.

On lightly floured surface, roll out each disc of pastry to 8-1/2 inch circle, leaving edge ragged. Arrange 3 of each on 2 large parchment paper-lined baking sheets.

Sprinkle center of each with bread crumbs. Spoon 1 cup rhubarb mixture over top; dot with 1 tsp butter. Lift pastry up over filling to form about 5-inch circle, letting pastry fall naturally into folds around edge and leaving center uncovered. (Make ahead: Cover and refrigerate for up to 24 hours.)

Glaze: Beat egg yolk with 1 tbsp water; brush over pastry. Sprinkle with reserved sugar.

Bake in top and bottom thirds of 425F oven for 10 minutes. Reduce heat to 350F; bake for 10 minutes. Switch and rotate pans. Bake for about 15 minutes or until filling is bubbly and crust in golden. Let cool on rack for 15 minutes.


This is an appeal on behalf of a group of food bloggers who are friends of Briana Brownlow @ Figs With Bri.

Bri was diagnosed with breast cancer two and half years ago. A mastectomy, chemotherapy and two years of relatively good health later, the cancer is back. It has metastasized to other parts of her body. At the age of 15, Bri lost her 41-year old mother to the disease. Now, she’s waging her own war against breast cancer. More about it here.


She is going through intensive chemo and other treatments and needs to focus single-mindedly on healing and finding what treatment works best for her. Her health insurance, unfortunately, does not cover holistic alternatives which she would like to try. Bri and her husband Marc have enough on their plates right now in addition to worrying about her medical bills.


The team organising the JUNE edition of CLICK at Jugalbandi has organised a fundraiser to help Bri and her family meet her out-of-pocket medical costs for ONE YEAR.


CLICK is a monthly theme-based photography contest hosted by Jugalbandi. This month’s theme is: YELLOW for Bri
Yellow is the colour of hope. Through the work of the LiveStrong Foundation, it has also come to signify the fight against cancer.

The entries can be viewed HERE. The deadline for entries is June 30, 2008. The fundraiser will extend until July 15, 2008.


The target amount is 12,000 U.S. dollars. We appeal to our fellow bloggers and readers to help us achieve this. Bri deserves a chance to explore all options, even if her insurance company thinks otherwise.


There’s a raffle with exciting prizes on offer. After viewing the list, you may make your donation HERE or at the Chip-In button on any participating site.
Your donation can be made securely through credit card or Pay Pal and goes directly to Bri’s account.

This month’s photo contest also has some prizes. Details HERE.

You can support this campaign by donating to the fundraiser, by participating in CLICK: the photo event, and by publicising
this campaign.

Pin It!

Tuesday, June 3, 2008

Tuesdays With Dorie - French Chocolate Brownies

Last week, as usual, I was looking forward to learning what this week’s pick would be for our Tuesdays with Dorie rendez-vous. Di, of Di’s Kitchen Notebook chose French Chocolate Brownies.

Ah, brownies. One can never have too many recipes for a good brownie. And this is no ordinary brownie. It’s contains 6 ounces of gorgeous chocolate and is chock full of boozed up raisins. Yes, raisins, boozed up, with rum. Tell me, how can this not be good? So, knowing a good thing when I see one, I doubled the raisins in the recipe, therefore, doubling the rum as well. Then, after plumping up some golden raisins and warming up the rum, I lit a match, flambéed said raisins and watched the most beautiful light show I’ve ever seen, in my very own kitchen. That was one cool moment my friends. I was so nervous though, I almost had a shot of rum afterwards to calm my nerves, but as it was 9 in the morning, I refrained myself.

As with any chocolate dessert, the brownies smelled divine and the worst part of making these was, of course, waiting for them to cool enough to be cut and devoured. After having a small taste, I realized that the rum flavor wasn’t very pronounced so I decided to whip up some rum scented cream. Yes, more rum. As I said how can this not be good? It can’t!

These were some of the most incredible brownies I’ve ever had, their texture is perfect, they taste fabulous and the rum scented whipped cream is just the best thing I could think of to make these even more grown-up. Of course, regular whipped cream, which is what I served the kids, would be great too. Just not as much fun. Thanks Di, this one’s a keeper! For a taste of what the rest of the gang thought of these babies, check out the Tuesdays with Dorie blogroll!

French Chocolate Brownies
- makes 16 brownies -
Adapted from Baking From My Home to Yours by Dorie Greenspan.

Ingredients
1/2 cup all-purpose flour
1/8 teaspoon salt
1/8 teaspoon cinnamon (optional)
1/3 cup raisins, dark or golden
1 1/2 tablespoons water
1 1/2 tablespoons dark rum
6 ounces bittersweet chocolate, finely chopped
1 1/2 sticks (12 tablespoons; 6 ounces) unsalted butter, at room temperature and cut into 12 pieces
3 large eggs, at room temperature
1 cup sugar

Getting ready: Center a rack in the oven and preheat the oven to 300°F. Line an 8-inch square baking pan with foil, butter the foil, place the pan on a baking sheet, and set aside.

Whisk together the flour, salt and cinnamon, if you're using it.

Put the raisins in a small saucepan with the water, bring to a boil over medium heat and cook until the water almost evaporates. Add the rum, let it warm for about 30 seconds, turn off the heat, stand back and ignite the rum. Allow the flames to die down, and set the raisins aside until needed.

Put the chocolate in a heatproof bowl and set the bowl over a saucepan of simmering water. Slowly and gently melt the chocolate, stirring occasionally. Remove the bowl from the saucepan and add the butter, stirring so that it melts. It's important that the chocolate and butter not get very hot. However, if the butter is not melting, you can put the bowl back over the still-hot water for a minute. If you've got a couple of little bits of unmelted butter, leave them—it's better to have a few bits than to overheat the whole. Set the chocolate aside for the moment.

Working with a stand mixer with the whisk attachment, or with a hand mixer in a large bowl, beat the eggs and sugar until they are thick and pale, about 2 minutes. Lower the mixer speed and pour in the chocolate-butter, mixing only until it is incorporated—you'll have a thick, creamy batter. Add the dry ingredients and mix at low speed for about 30 seconds—the dry ingredients won't be completely incorporated and that's fine. Finish folding in the dry ingredients by hand with a rubber spatula, then fold in the raisins along with any liquid remaining in the pan.

Scrape the batter into the pan and bake 50 to 60 minutes, or until the top is dry and crackled and a knife inserted into the center of the cake comes out clean. Transfer the pan to a rack and allow the brownies to cool to warm or room temperature.

Carefully lift the brownies out of the pan, using the foil edges as handles, and transfer to a cutting board. With a long-bladed knife, cut the brownies into 16 squares, each roughly 2 inches on a side, taking care not to cut through the foil.

Serving: The brownies are good just warm or at room temperature; they're even fine cold. I like these with a little something on top or alongside—good go-alongs are whipped crème fraîche or whipped cream, ice cream or chocolate sauce or even all three!

Storing: Wrapped well, these can be kept at room temperature for up to 3 days or frozen for up to 2 months.

Pin It!

Sunday, June 1, 2008

A Little Tartness, For a Change

Usually, when I get a new cooking magazine, there’s at least one recipe that catches my eye right away. And usually, I don’t stop thinking about it until I make it. This happened with a recent Ricardo magazine. It’s a special issue, all about gardening and even though I have no garden and no space to even thick about gardening, I got the mag anyway, for the recipes.

The recipe I couldn’t stop thinking about was the Ground Cherry and Vanilla Compote. I just love ground cherries and I was so intrigued at what pairing them with vanilla would do that I could almost taste it. So when I saw beautiful ground cherries at the supermarket, I jumped at the chance.

This is such an easy recipe, very simple and so satisfying. You get the sweet tartness of the ground cherries with the scent of the vanilla and the touch of lemon that comes through. And the golden amber color of the compote just makes it even more mouth watering. It is totally worth using one whole vanilla bean.

And since I had some brioche dough leftover from the last Tuesday with Dorie recipe, I baked it off into a loaf and spooned the compote over brioche slices. I couldn’t ask for a better dessert. Which by the way served as my birthday dessert. I mean, after the cutie patootee cupcakes I made for Olivia, the Pecan Honey Sticky Buns I made for Tuesdays with Dorie, and the next TWD recipe, which I haven’t even made yet, procrastinator that I am, I needed to make something a little lighter.

And this was perfect, just sweet and tart enough to change from the rich desserts we’d been having lately. But don’t worry, a rich, dark and sinful dessert is coming up soon, very soon.

Ground Cherry and Vanilla Compote
Adapted from Ricardo Magazine, Special Gardening Issue

* The recipe says to pour the compote into sterilized jars but I just kept mine in the refrigerator.

4 cups ground cherries
1 cup sugar
1/4 cup lemon juice
1 vanilla bean or 1 tsp pure vanilla extract

In a saucepan, mix together the ground cherries, the sugar and the lemon juice. Split the vanilla bean lengthwise and with the tip of a knife, remove all of its seeds. Add the seeds and the bean to the pan. If you use vanilla extract, add it only after the compote has finished cooking. Stirring frequently, bring the mixture to a boil. Simmer for about 25 minutes or until the cooking juices are slightly syrupy. Remove the vanilla bean and pour the compote into sterilized jars. Serve with toast, cookies or vanilla cake.

Pin It!